Offsite Backup Version 2.0
Posted on November 13th 2020
So as you have probably guessed this is my second attempt at an offsite backup solution. Version 1.0 was covered by a previous blog post but I can't really recommend going that route anymore - the performance was pretty terrible. Transfer speeds were in the Kb/s range rather than Mb/s range. This meant that if I added a few hundred photos to my local NAS it could take the best part of a week for the backup server to catch up which wasn't really ideal. The previous solution consisted of a Raspberry Pi 3b+ and an old 2TB external USB HDD as you can see below. The old post is available here but again I don't really recommend trying it out as the performance was so bad.

A lot of the same requirements from Version 1.0 still apply for the second iteration:
- It should be plug and play. My friend should not have to worry about maintaining the backup server
- I should be able to access the backup server from my LAN without opening up ports in my friend's firewall
- The data should be secure in transit and at rest
- It should also be as quiet and compact as possible
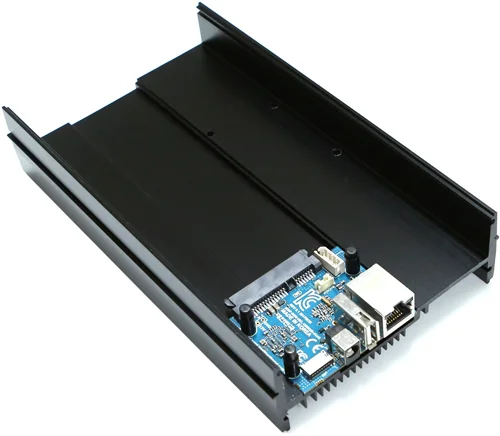
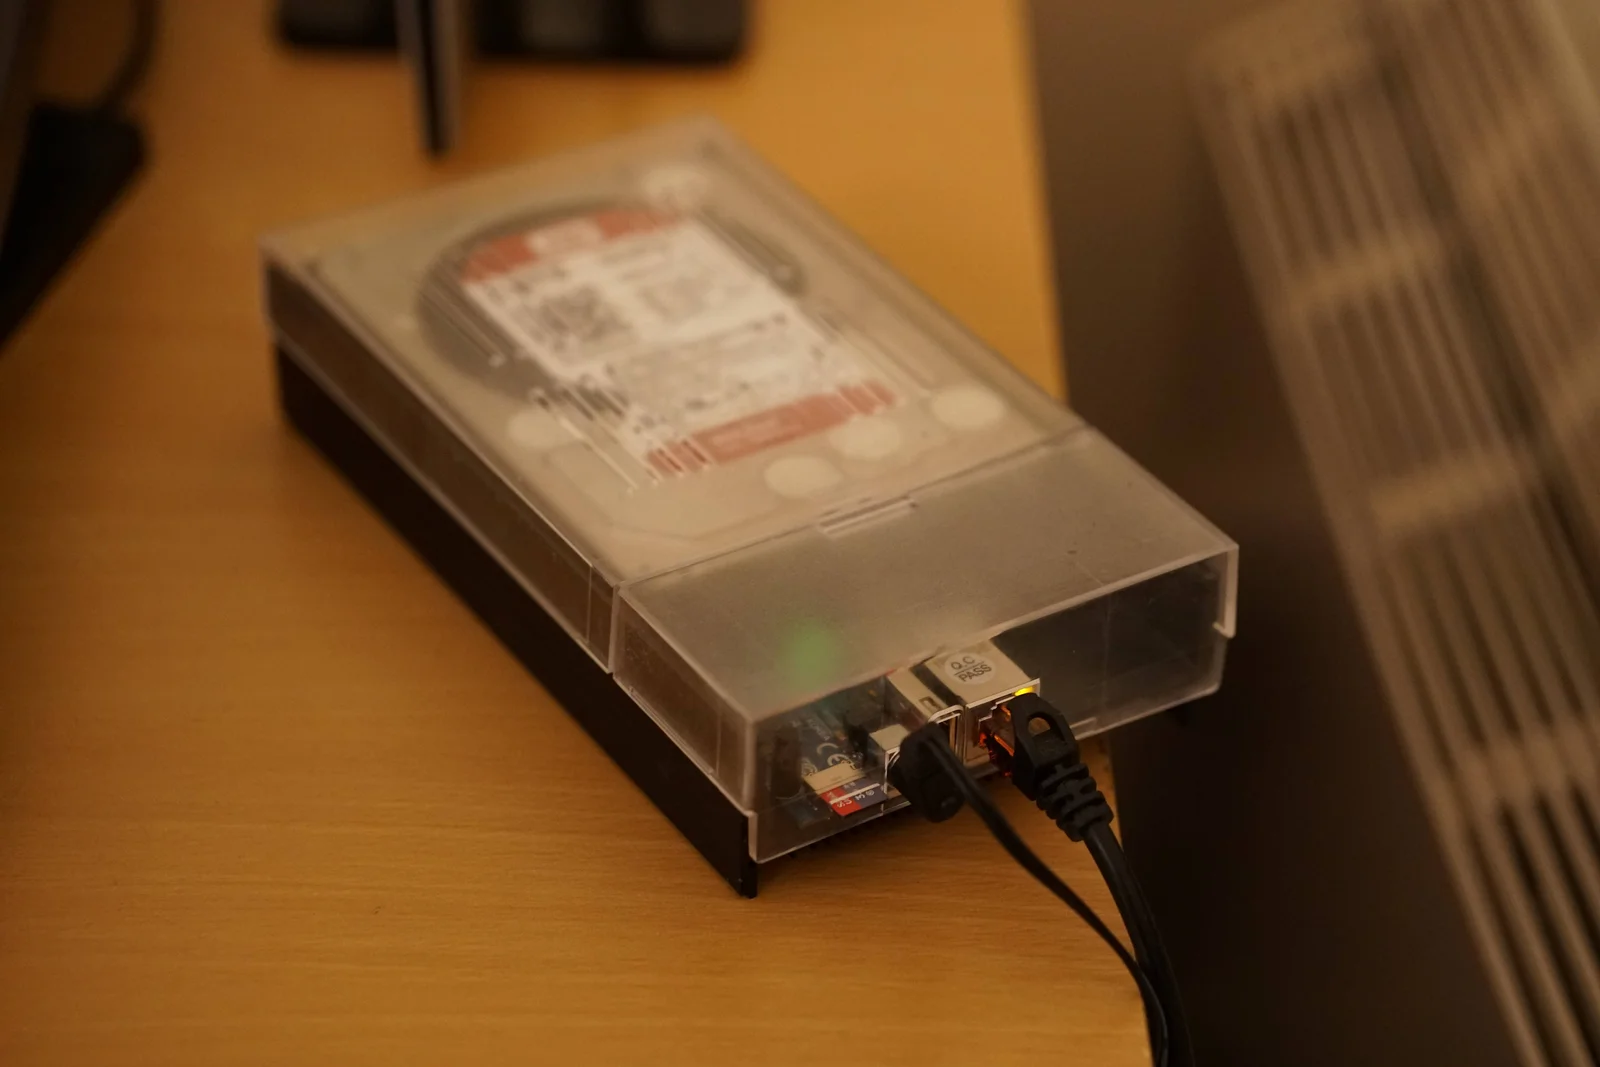
Version 2 is a much tidier solution than it's predecessor. The Odroid HC2 from Hardkernel is an eight core ARM based single board computer that can house and power a 3.5 inch hard drive. Its a very handy machine and much better than the Raspberry Pi 3b+ for NAS applications as it comes with gigabit ethernet port vs. the 330 Mbit ethernet port on the Pi. The 3.5 inch HDD bay in the Odroid HC2 also allows for larger storage capacity especially when compared to the 2.5 inch external HDD used in my last offsite backup. I went with a 6TB WD Red drive which should leave plenty of space for the next couple of years. The drive is LUKS encrypted to protect the data at rest. The WD Reds are generally known as fairly quiet drives while the Odroid HC2 is passively cooled so the machine is nearly silent when running which is great. The heatsink for this board is quite large as it is also used to mount 3.5 inch drive.
On the software side of things, its a pretty simple setup as there is an Ubuntu 20.04 image available for the Odroid HC2. I decided to go with Wireguard this time over OpenVPN for the tunnel back to my local network. Wireguard is supposed to perform much better than OpenVPN and is relatively easy to setup. I did have a couple of hiccups early on with Wireguard. Firstly as most of my systems are Fedora based I have gotten used to just having to install wireguard-tools to get up and running with wg-quick however on the Odroid the Wireguard interface was not being created. I did not realise that Ubuntu 20.04 was back on kernel 5.4 so Wireguard was not available out of the box as it was introduced in kernel 5.6. Once I got it installed successfully, I carried out some testing over my local network and everything seemed to be working well so I shipped it off to my friend's place and asked him to just plug it in. I had a couple of frustrating days after this trying to figure out why the offsite peer would periodically have a successful handshake with my onsite peer but then drop the connection and become unreachable. So long story short - "NAT and Firewall Traversal Persistence" - it turns out that Wireguard only sends traffic when needed and since the backup server was sitting idle 99% of the time, the firewalls inbetween were dropping the inactive connections. I had to get my offsite peer to send keepalive packets over the tunnel in order to stop the connection being dropped. This can be done by adding "PersistentKeepalive = 25" to the peer configuration. The value 25 is the period in seconds between keepalive packets.
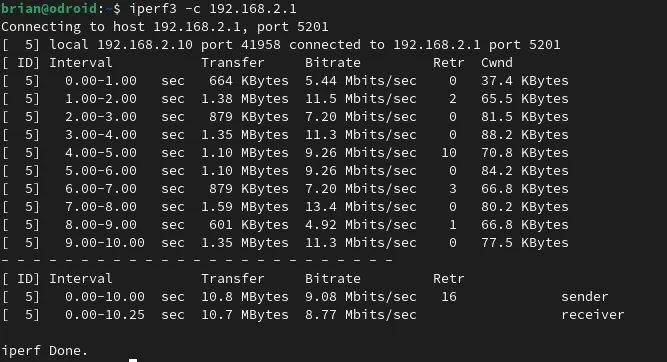
The Wireguard tunnel has been solid since this configuration update and the performance has been pretty impressive. Here you can see an iperf test between the onsite peer and offsite peer to give you an idea of the kind of network performance that I am getting over the Wireguard tunnel.
For the backup process itself I have tried to keep it as simple as possible to reduce the number of potential failure points. There is a bash script on the offsite server that is run nightly as part of a cronjob. This script just mounts NFS shares from the onsite source server and then rsyncs any new files to the 6TB drive in the backup server. From some quick testing, I'm getting read speeds of about 4 MB/s from the onsite server which is miles better than my previous offsite solution.

The backups of large imports from my camera have gone from taking the bones of a week to completing overnight thanks to this new offsite solution. This gives me a lot more confidence in my offsite backup. If you are wondering why you might need an offsite backup, you can check out my V1 post where I go through my reasons for needing one.